Doing More With Kronos WorkForce Schedule Patterns
Dwain Lambrigger
Jun 16, 2014
Your web browser is out of date. Update your browser for more security, speed, and the best experience on this site.
You may also visit the site on your mobile device.
In our last entry, we defined what patterns in Kronos WorkForce Basic Scheduler are, and started discovering what you can do with patterns. In this entry, we continue that conversation.
We already discovered a cool thing with schedule patterns, building a pattern with pay code edits. Well, let's extend that idea to shifts. Any shift you create can be part of a pattern. So, labor account transfers? Yes. Work rule transfers? Yes. Applying shift patterns? Yes.
But, how? Let's revisit the Pattern Editor again.
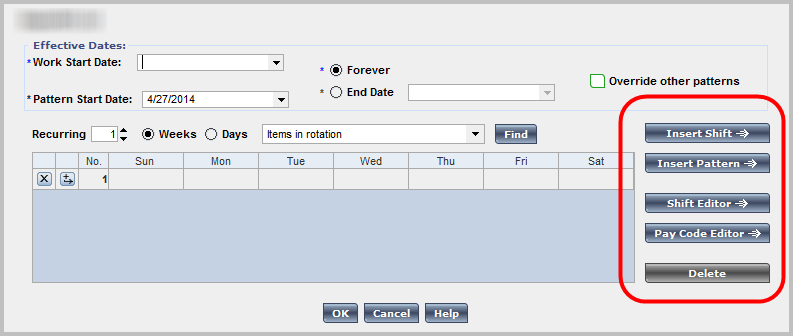
The circled buttons are the key. Most users are so robotic about applying patterns that they don't see the value in a lot of these buttons. Here is a quick review:
Click this button to apply a shift template to the pattern. Here's a picture:
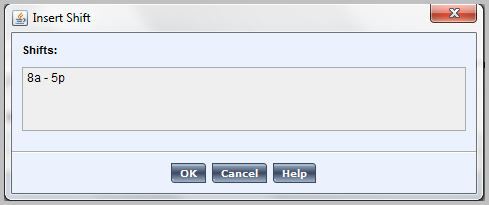
I know, I know; we need to add some shift patterns here. It's a basic screen, click the shift pattern, click OK and boom! You can walk away happy. The shift is added to the pattern.
Like the name says, this is where you insert a pattern, well actually, a pattern template. A lot like the Insert Shift screen. Here's a look:
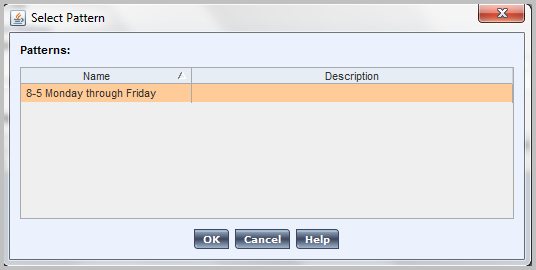
Certainly not going to meet the needs of an organization with this list! Still, easy to use. Click the pattern, click OK and Bob's your uncle!
This takes you to the shift editor screen. It is like the "Add Shift" or "Edit Shift" screens in a schedule. It's here that you apply work rule transfers or labor account transfers. If you have to apply a shift across the day divide, it's a good idea to do it from the shift editor. Basically, if the shift can't be entered via in-cell editing, or copying and pasting, go to the shift editor. Another image:
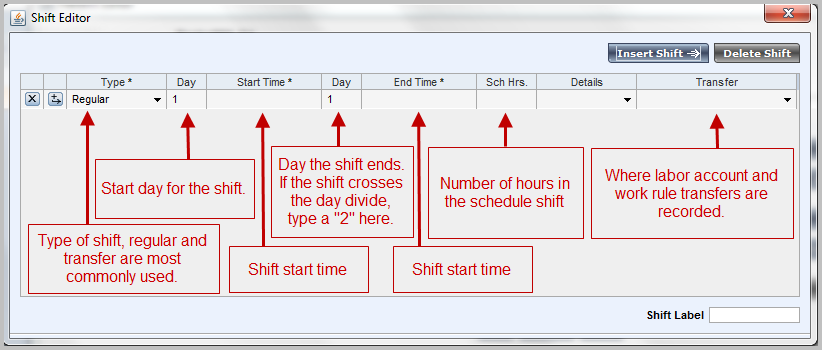
The transfer key is just like the transfer field in the time card. No difference. Don't let it bother you! Remember if your shift crosses the day divide, type "1" in the first Day field and "2" in the second. Also, it's good practice to keep an eye on what is given in the Sch Hrs field. Often, if a mistake is made in the day divide, you may see a lot more hours than you were expecting. A sign that something is wrong! Again, the transfer field here is where the magic happens:Where you can go to record those transfers into a shift...which gets added to a pattern...which is set to repeat...which is applied to an employee...so the employee is scheduled...forever.
Here is where you add your pay codes. It's almost exactly like applying a pay code to a scheduled shift. Again, a photo for the album:
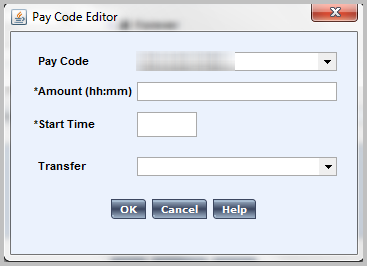
So you choose the pay code, the amount of time, the start time for the pay code edit and a transfer (work rule or labor account), then click OK.
Now you may have noticed that I didn't go into detail about how to record transfers to a shift to a pattern. I don't need to. You have probably already assigned a transfer to a shift, or to time in a time card.
If you have done that, you can do this.
I am also not going into the basics of creating a pattern, again, I am assuming you have done this already. What I want to do with this entry is to expose you to some of the features you may not have been using in the pattern editor, and by doing that, change your frame of reference to make you look at them differently.
Here's hoping it worked, and that you are going to build more effective patterns.


Comments